There are many ways to install WordPress on Google Cloud Platform or GCP. Well, GCP also provides the one-click option for that but if you are like me who is obsessed with performance and you also want to have the flexibility to change settings in the future then you are in the right place. In this tutorial, you just need to copy three commands in the terminal and you are good to go and don’t afraid I am going to show you just that step by step.
For this tutorial, we will use a script called WordOps which will install WordPress with Nginx, MariaDB, and PHP with an SSL to secure the website. So without wasting time let’s get started.
Create A VM Instance
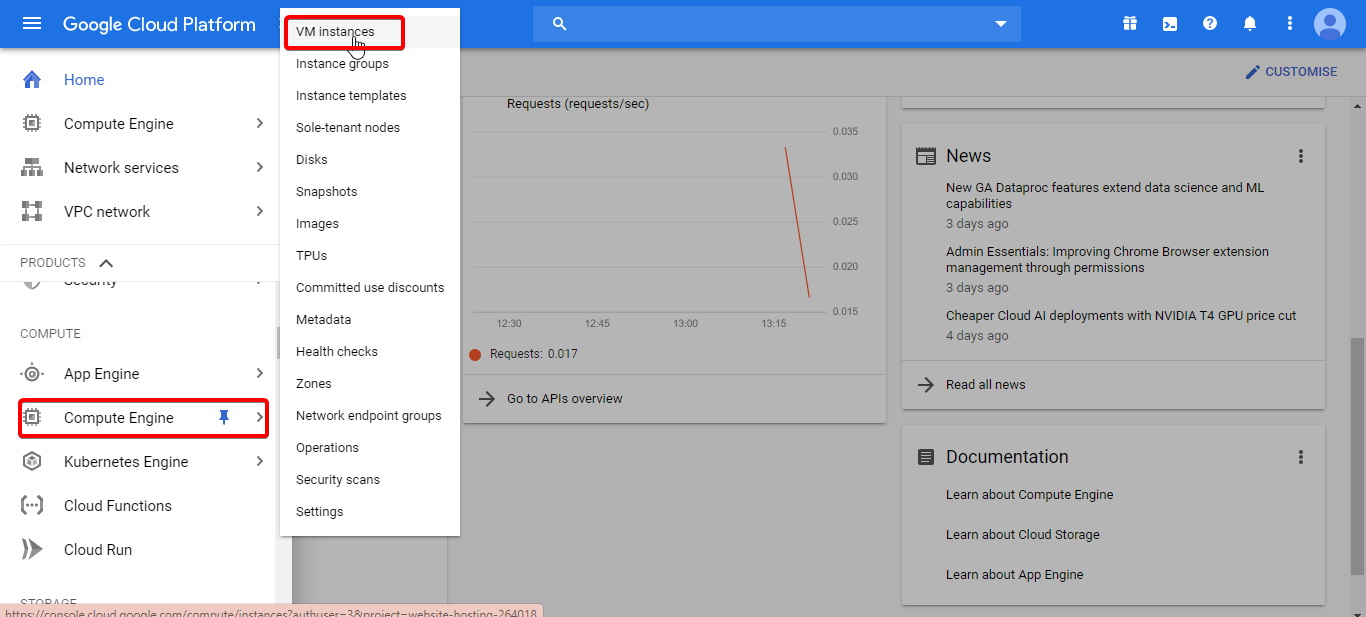
Step 1: Go to your Google Cloud Console then choose your project. Then from the Navigation Window go to Compute then to VM Instances.
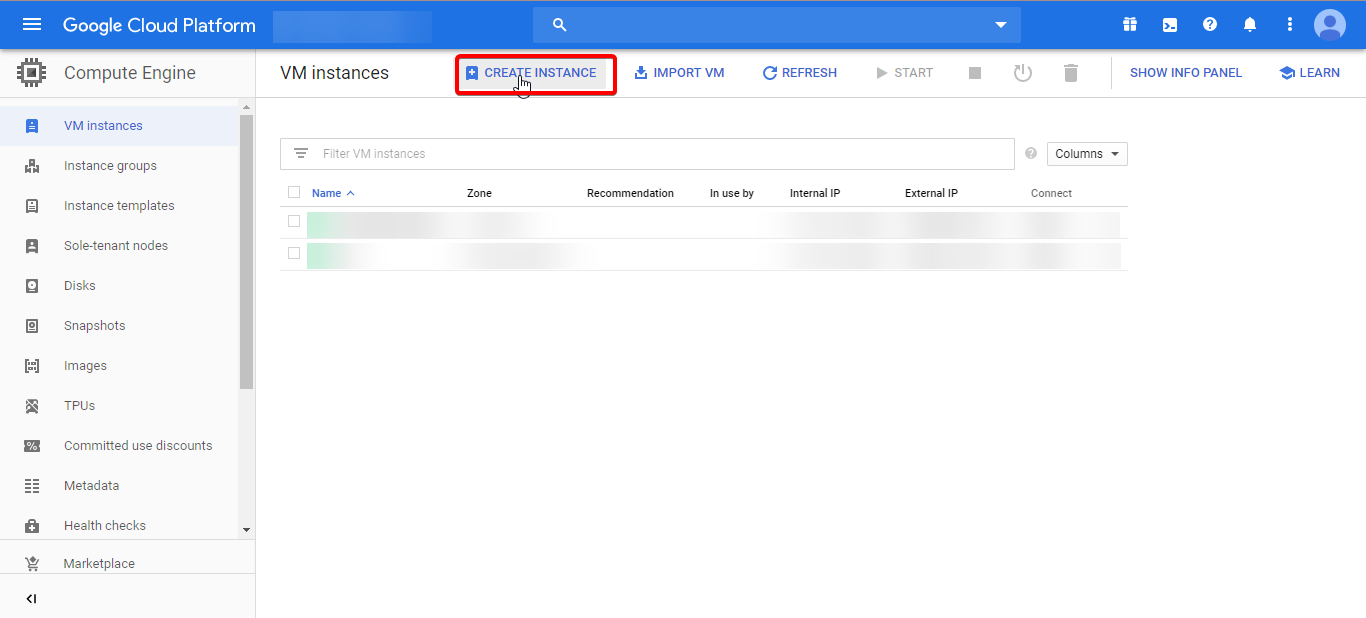
Step 2: Then click on the Create Instances which will take you to the configuration page.
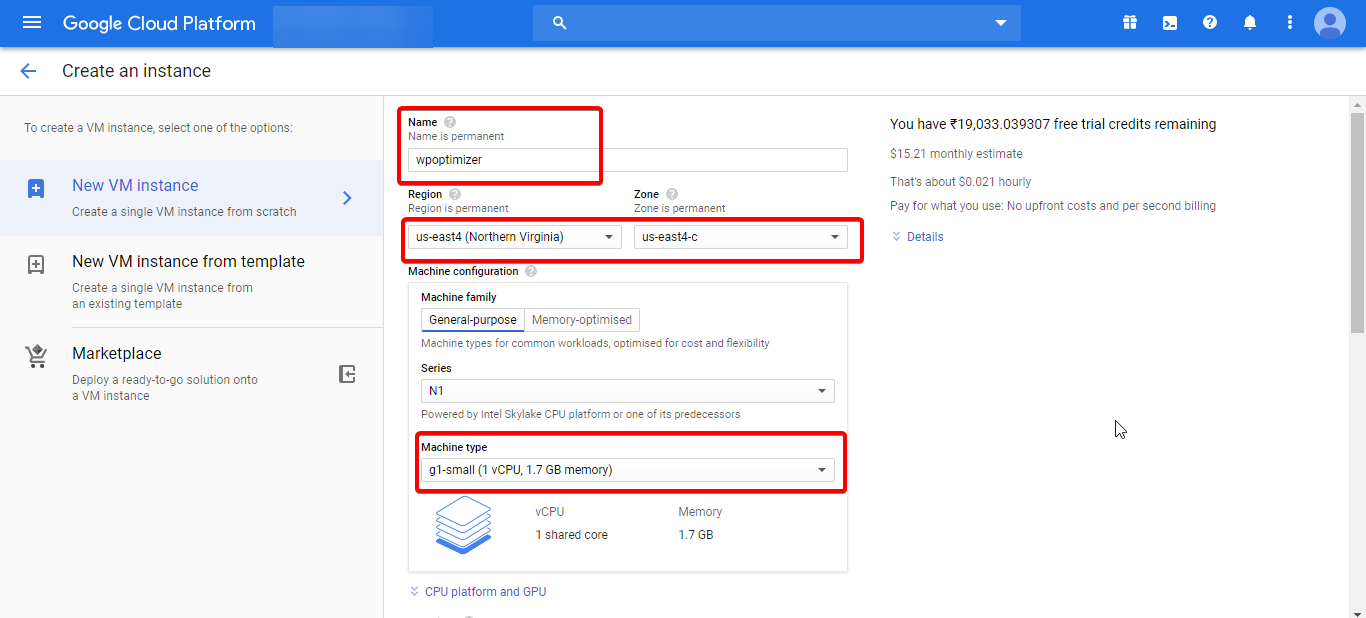
Step 3: In the configuration page give your instance a name then select the region where you want your server. Then select the machine configuration. For a small WordPress g1-small enough but if you are on a short budget then you can also select the f1- micro, it will work just fine for small traffic websites.
Step 4: In this step, you need to select the OS for the machine. We will use Ubuntu 18.04 LTS version in this video. To select the OS click on the change button on the boot disk section and then select Ubuntu as the operating system and Ubuntu 18.04 LTS as the version and in the boot disk type section, we will use SSD for better performance. Please note that SSD will increase your budget a little bit.
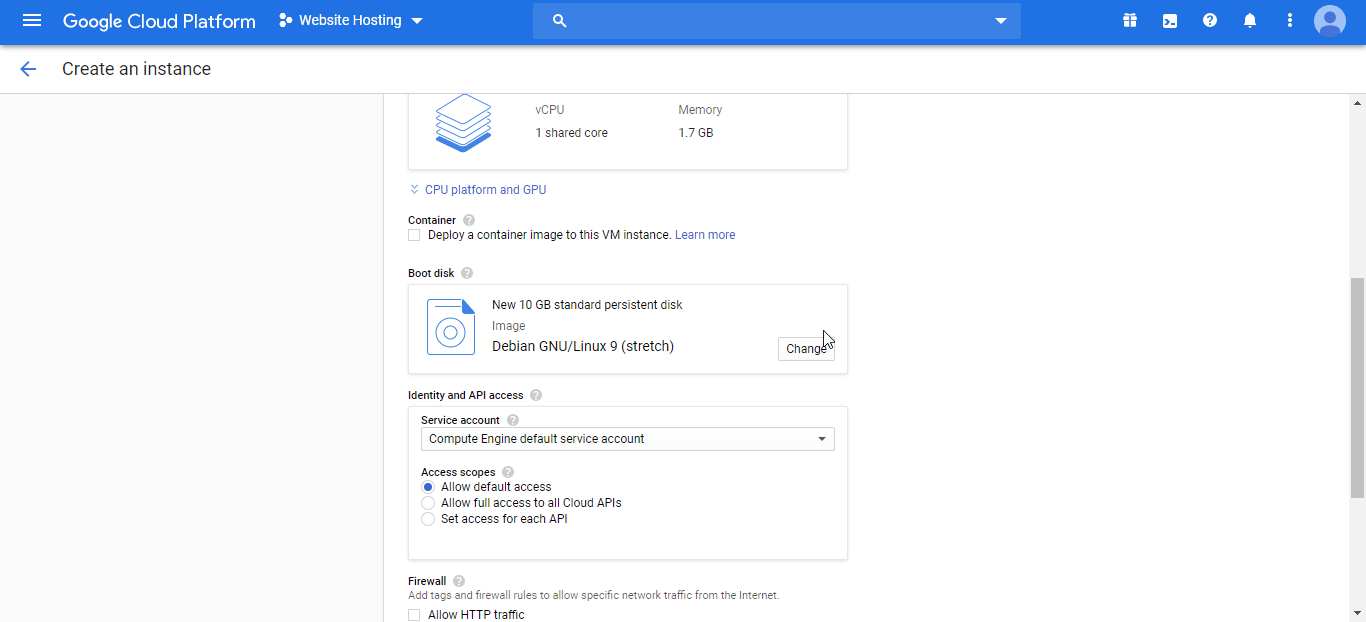
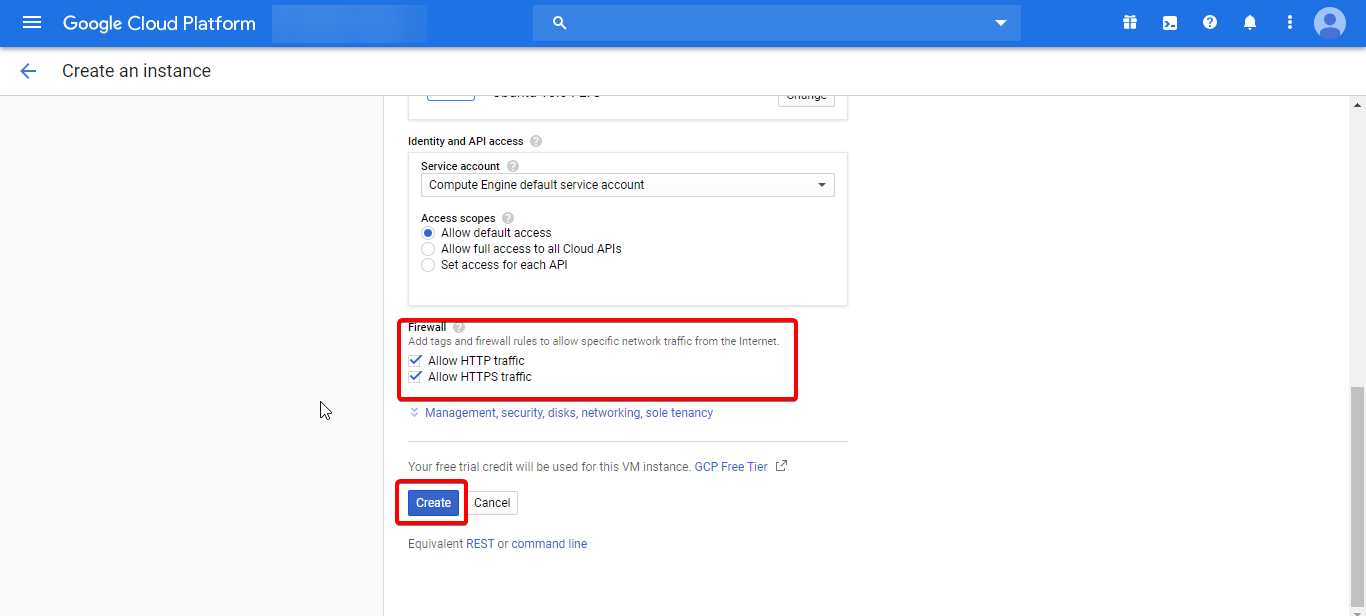
Step 5: In the firewall, section select both HTTP and HTTPS traffic. Then click on the create button. It may take some time. After the successful creation, you will see a green tick before the VM Instance name.
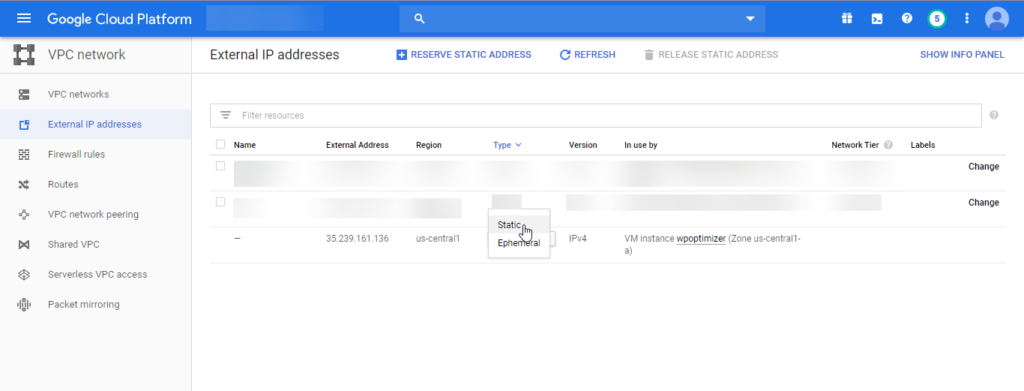
Assign Static IP With VM
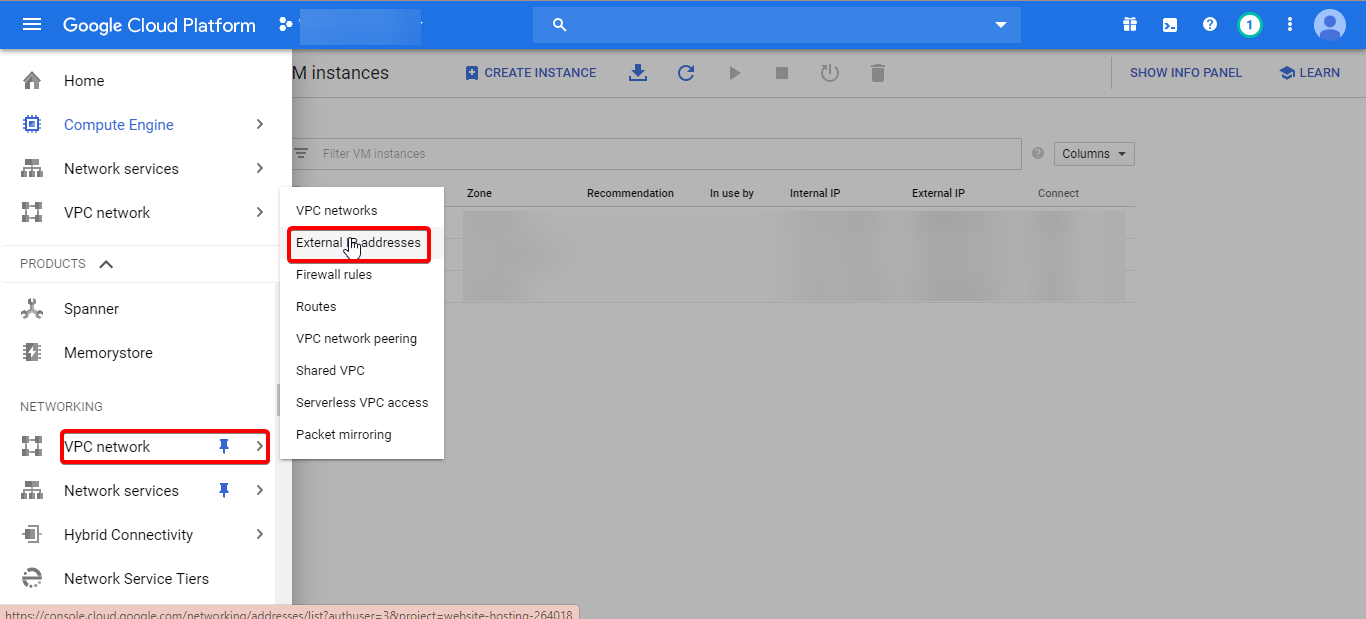
Step 1: By default, GCP will assign a non-static IP to your VM. So to make your IP static you need to click on the Navigation Menu then from Networking Section select the VPC network and then External IP Addresses.
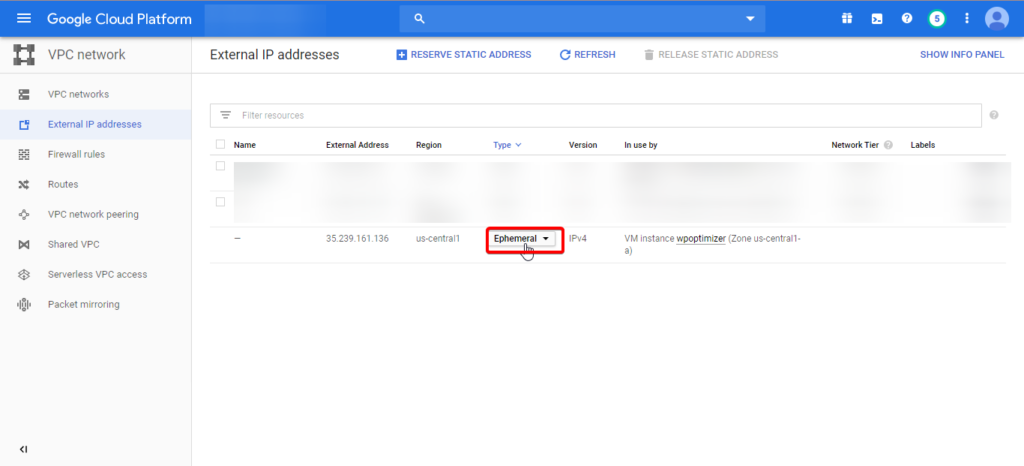
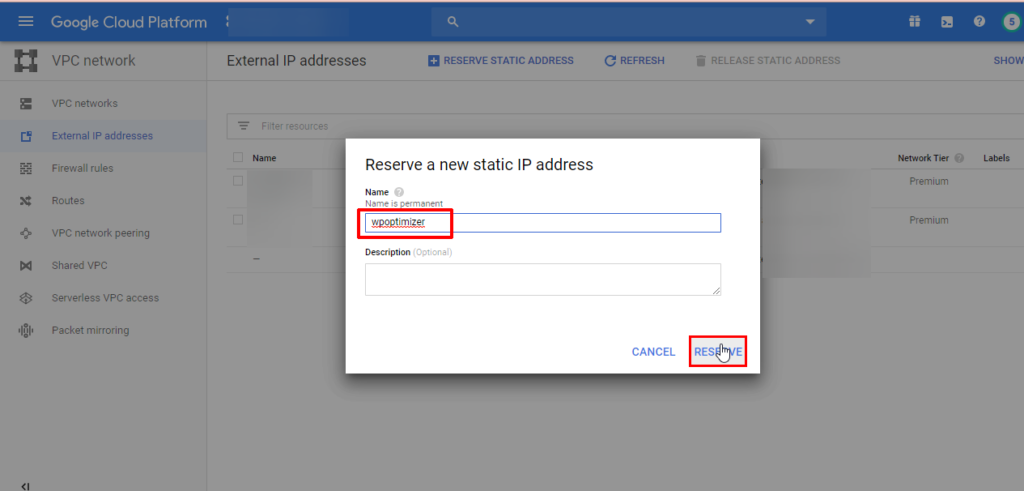
Step 2: Then in the type section select Static. And then give it a name and click on reserve.
Point Your Domain To The VM IP
Now is a good time to point your domain to the VM IP for people to access your site. Now I can’t show you the steps for each DNS provider. So ask your DNS provider how to do it or they should have documentation on their site about this.
SSH Into Your VM
Now I know you may be afraid of the terminal but trust me this is easier than installing an application on your Windows computer (guessing MAC people are already familiar with the terminal).
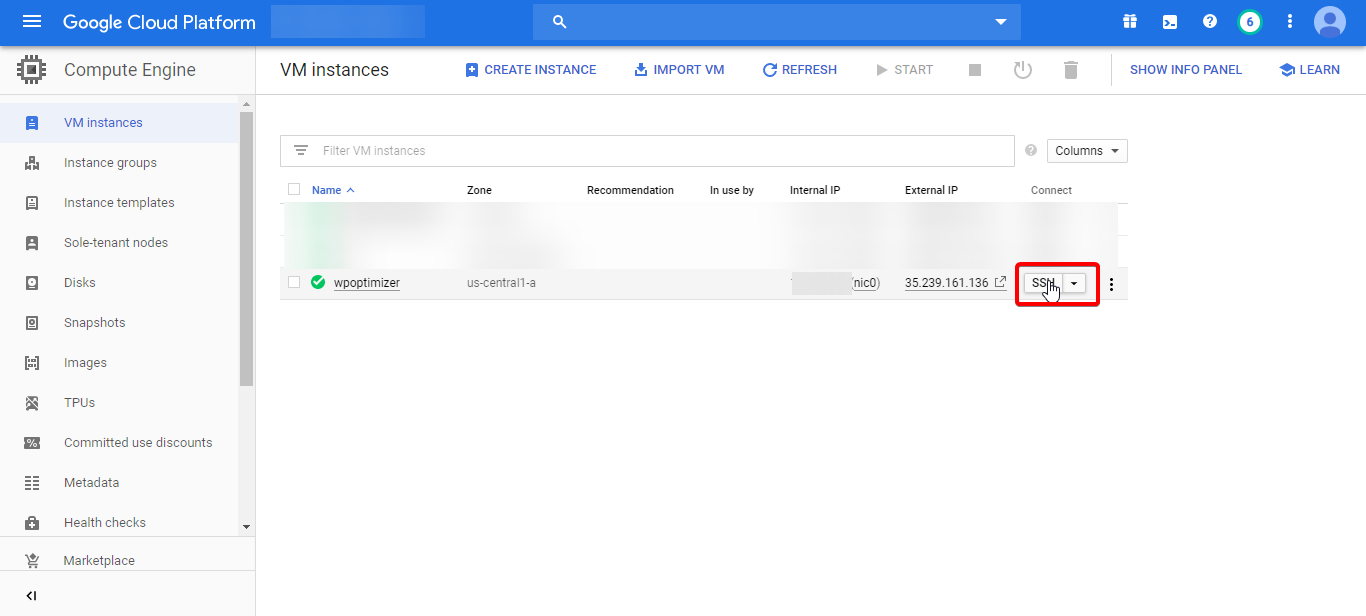
Step 1: So go back to your VM Instances page and click on the SSH button. Which will open a new window in your browser.
Step 1: In the terminal type
sudo apt update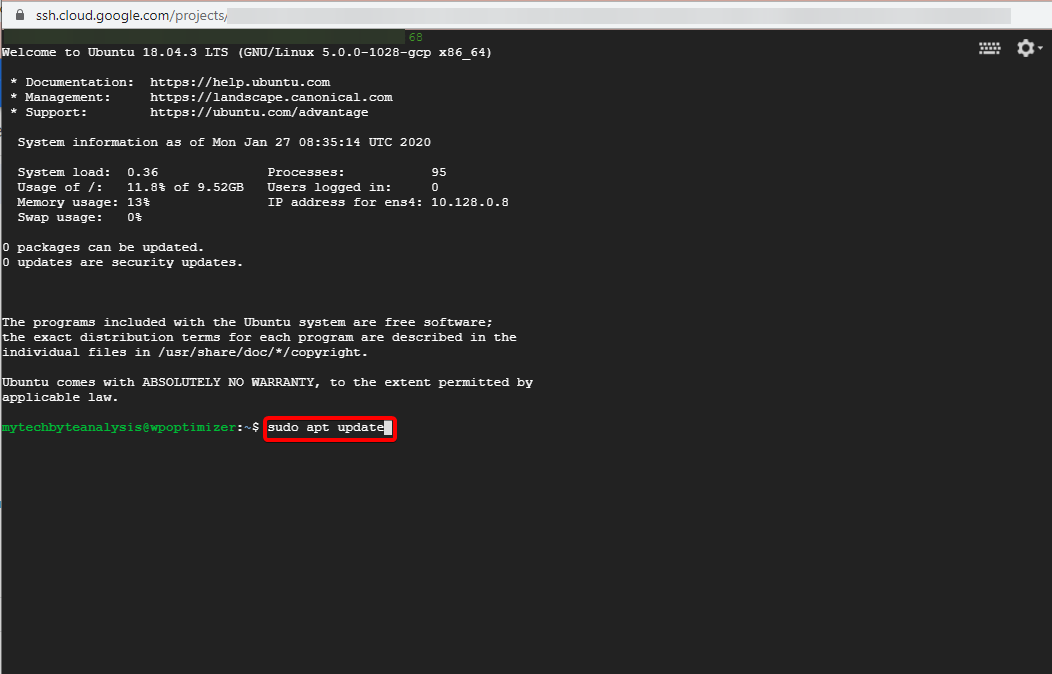
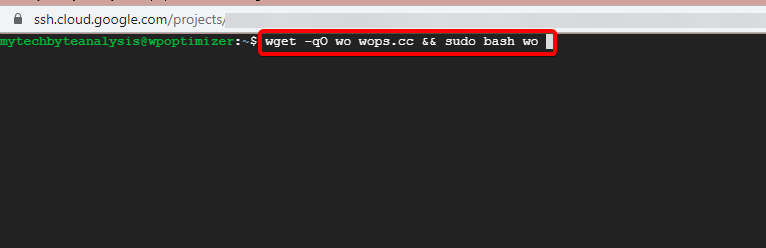
Step 2: In this step, we will download the script and will run it. To do so type
wget -qO wo wops.cc && sudo bash woNow it may take some time depending on your server configuration. In the middle of the installation, it will ask for a username and email address. So, provide that information. Don’t worry it will save those locally on your server.
Step 3: In this step, we will install WordPress itself. In this step, we can configure our server however we want. We will use Nginx fastcgi_cache. Now you can also use Redis cache, WP-Super-cache, and WP-Rocket cache. To use these replace –wpfc in the command with –wpredis, –wpsc, –wprocket respectively. If you don’t want to use cache then replace –wpfc with –wp. You can also choose the version of PHP between PHP 8.0, PHP 8.1, PHP 8.2, and PHP 8.3. To choose PHP 8.0 use –php8, to choose PHP 8.1 use –php81, to choose PHP 8.2 use –php82 and to choose PHP 8.3 use –php8.3. We will use a letsencrypt free SSL certificate to secure the site. And the username and password in this command are for your WordPress site so don’t forget those.
sudo wo site create example.com --wpfc --user=your_user_name --pass=your_password --email=your_email --php83 --letsencrypt 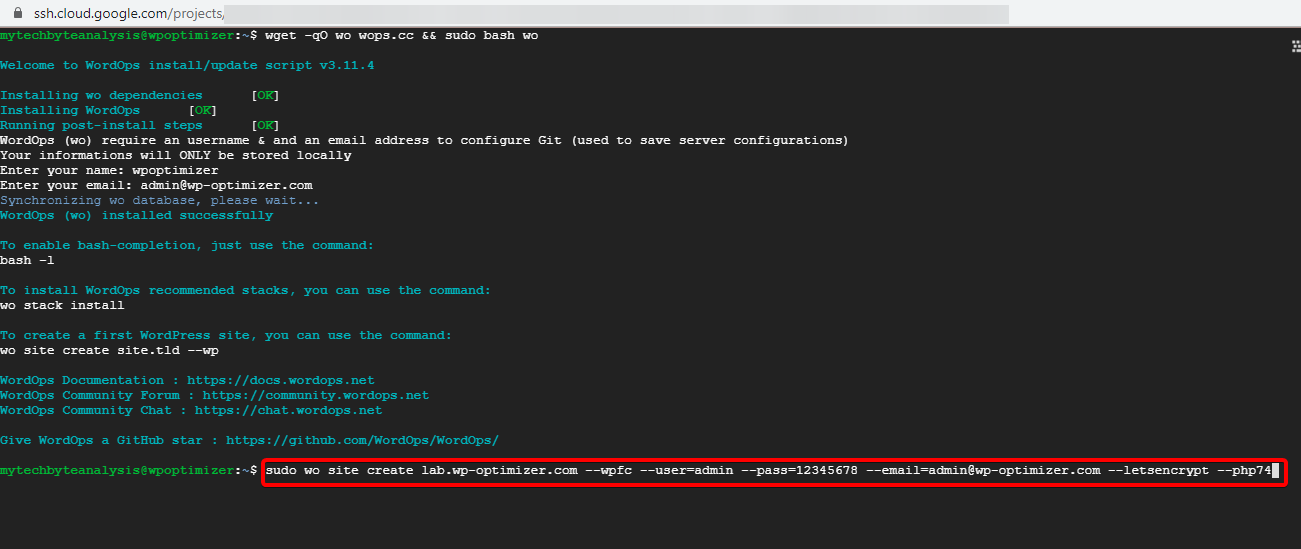
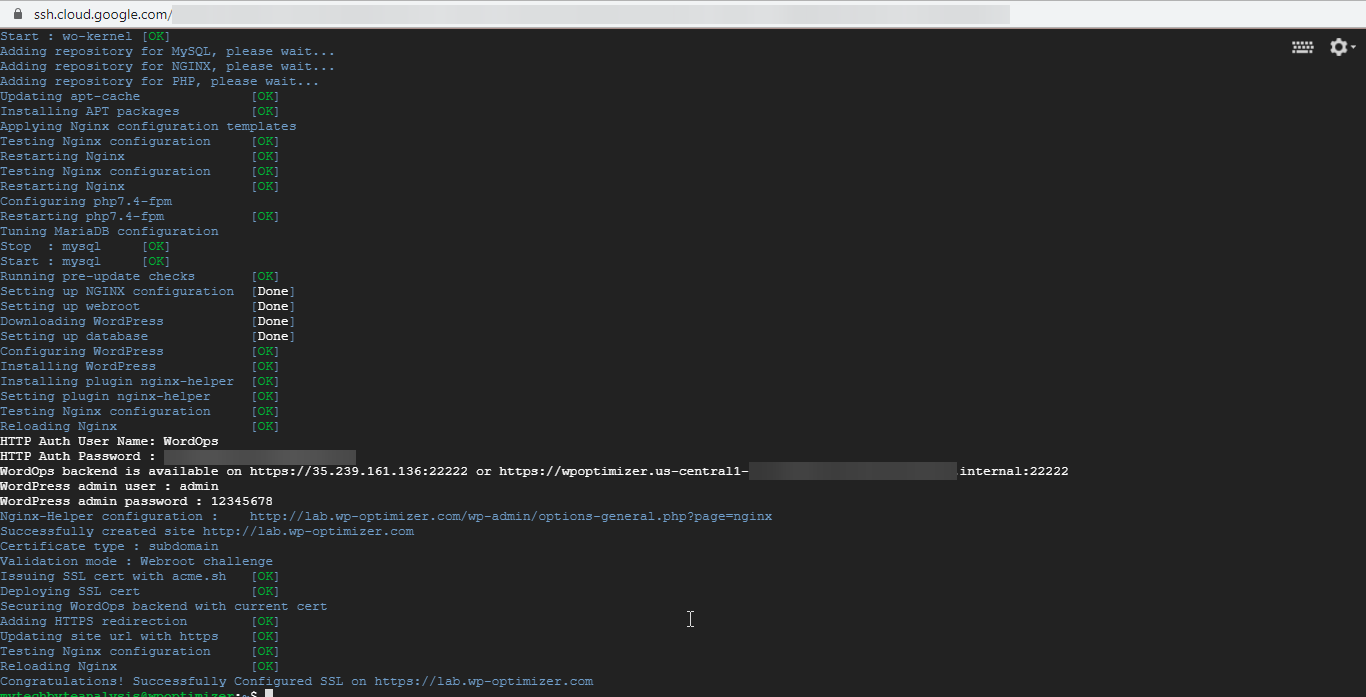
Access Your Site
That’s it. You have successfully installed WordPress along with Nginx, MariaDB, and PHP. Now can access your site at your domain address (if DNS propagation is completed).
So if you have any questions regarding any settings please let me know I will get back to you ASAP. Happy coding.